
Drag and drop functions are a fun interaction, but they may not be the best interface in every situation. Buttons are a great affordance, and we can hook them up into our existing drag and drop code without any issue. Then we’ll look into animating the movement on the page so that it still feels interactive.
Adding Buttons
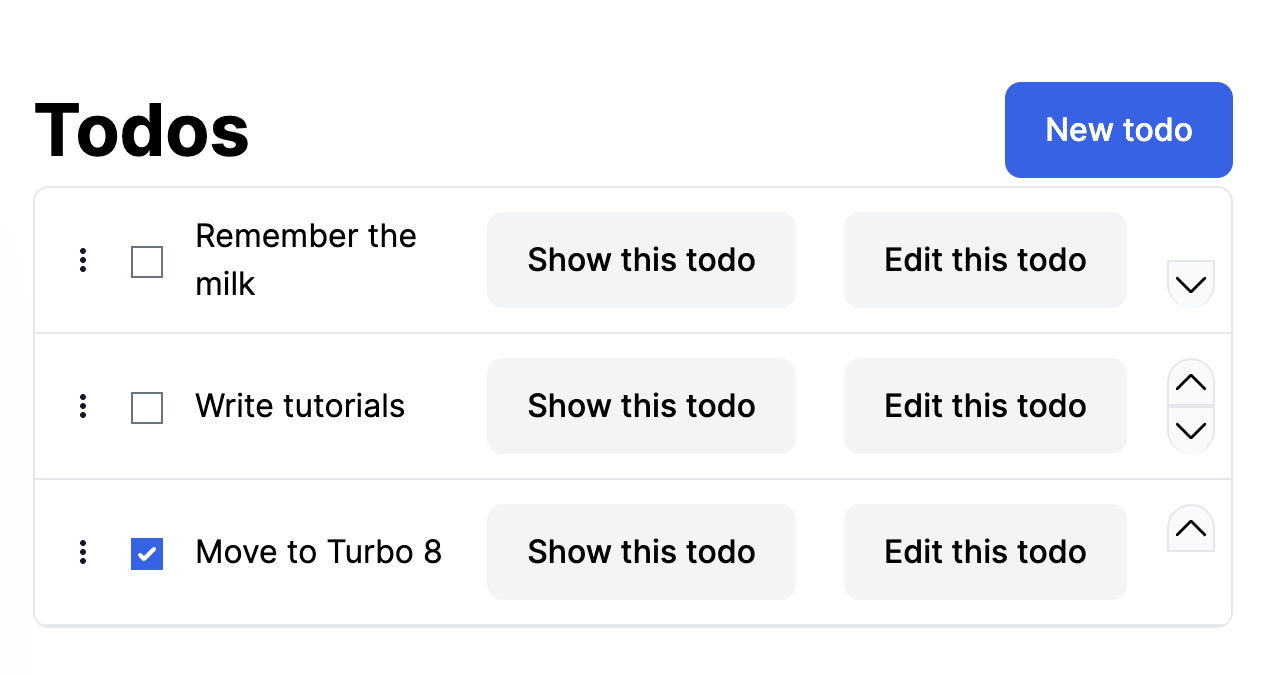
On the right side of each Todo row, let’s add an up and down arrow button. These will get their own actions, moveUp and moveDown on the Stimulus controller that will be refactored into moving the Todo up and down, and sending the change to the server. The icons come from Heroicons.
  <div class="flex flex-col h-full mr-2 divide-y w-fit">
    <button class="w-6 h-6 border rounded-t-full bg-gray-50 hover:bg-gray-300 up"
      data-action="reorder#moveUp">
      <svg xmlns="http://www.w3.org/2000/svg"
      fill="none"
      viewBox="0 0 24 24"
      stroke-width="1.5"
      stroke="currentColor" >
        <path stroke-linecap="round" stroke-linejoin="round" d="m4.5 15.75 7.5-7.5 7.5 7.5" />
      </svg>
    </button>
    <button
      class="w-6 h-6 border rounded-b-full bg-gray-50 hover:bg-gray-300 down"
      data-action="reorder#moveDown">
      <svg xmlns="http://www.w3.org/2000/svg"
      fill="none"
      viewBox="0 0 24 24"
      stroke-width="1.5"
      stroke="currentColor">
        <path stroke-linecap="round" stroke-linejoin="round" d="m19.5 8.25-7.5 7.5-7.5-7.5" />
      </svg>
    </button>
  </div>
Hiding Unnecessary Buttons
If you just refresh the HTML, you’ll see the top row has a button to move up, and the bottom row has a button to move down. This doesn’t make sense, and looks sloppy. We can use the power of CSS to hide those buttons automatically, and save us some work. Add these lines to your CSS file:
div.todo:first-of-type > div > button.up {
  visibility: hidden;
}
div.todo:last-of-type > div > button.down {
  visibility: hidden;
}
The outermost div in todos\_todo.html.erb gets a new class todo and each button has either the up or down class classes. We set up CSS selectors to hide the up button in the first Todo row, and the dow button on the last Todo row.
Updating the Stimulus controller
The Stimulus controller gets refactored into a few new methods. The first is moveItems which moves the items on the page, and then performs the network update call.
moveItems(item, target) {
    if (
      target.compareDocumentPosition(item) & Node.DOCUMENT_POSITION_FOLLOWING
    ) {
      let result = target.insertAdjacentElement("beforebegin", item);
    } else if (
      target.compareDocumentPosition(item) & Node.DOCUMENT_POSITION_PRECEDING
    ) {
      let result = target.insertAdjacentElement("afterend", item);
    }

    let formData = new FormData();
    formData.append("reorderable_target_id", target.dataset.reorderableId);

    fetch(item.dataset.reorderablePath, {
      body: formData,
      method: "PATCH",
      credentials: "include",
      dataType: "script",
      headers: {
        "X-CSRF-Token": getMetaValue("csrf-token"),
      },
      redirect: "manual",
    });
  }
The moveDown and moveUp functions now use this moveItems function. First the item checks to see if there is a sibling node in the requested direction, and if that sibling has a reorderable id.
async moveUp(event) {
    let parent = getDataNode(event.target);
    if (
      parent.previousSibling.dataset != null &&
      parent.previousSibling.dataset.reorderableId != null
    ) {
      this.animateSwitch(parent.nextSibling, parent);
      await Promise.all(
        parent.getAnimations().map((animation) => animation.finished)
      );
      this.moveItems(parent, parent.previousSibling);
    }
    event.preventDefault();
  }

  async moveDown(event) {
    let parent = getDataNode(event.target);
    if (
      parent.nextSibling.dataset != null &&
      parent.nextSibling.dataset.reorderableId != null
    ) {
       this.animateSwitch(parent.nextSibling, parent);
      await Promise.all(
        parent.getAnimations().map((animation) => animation.finished)
      );
       this.moveItems(parent, parent.nextSibling);
    }

    event.preventDefault();
  }
The best part is the animateSwitch method. It takes two rows, which it’s assumed are next to each other, and uses the transform property of an item to move the row either up or down in the vertical/Y direction. Once the animations are done, the moveItems will actually change the location of the rows in the DOM.
animateSwitch(from, to) {
    from.animate([{ transform: `translateY(-${from.clientHeight}px)` }], {
      duration: 300,
      easing: "ease-in-out",
    });

    to.animate([{ transform: `translateY(${to.clientHeight}px)` }], {
      duration: 300,
      easing: "ease-in-out",
    });
  }
Accessible and Interactive
Now, we have buttons that someone can use to move the Todos up and down, and we can use animation as an affordance that the change happened. And we use basic animations, rather than needing to import a whole UI framework.
You can see all the changes on Github.